
A driveshaft carrier bearing — often called a center support bearing — is a small component that plays an outsized role in driveline comfort and reliability. When it’s healthy, you don’t notice it; when it fails, vibrations, noise, and drivability problems quickly become impossible to ignore.
This guide explains what a driveshaft carrier bearing is, the common types, how to spot failure early, and how to replace one safely and properly. Whether you’re a professional mechanic or an experienced DIYer, you’ll get practical, actionable advice to get the job done and keep your vehicle running smoothly.
What is a driveshaft carrier bearing?

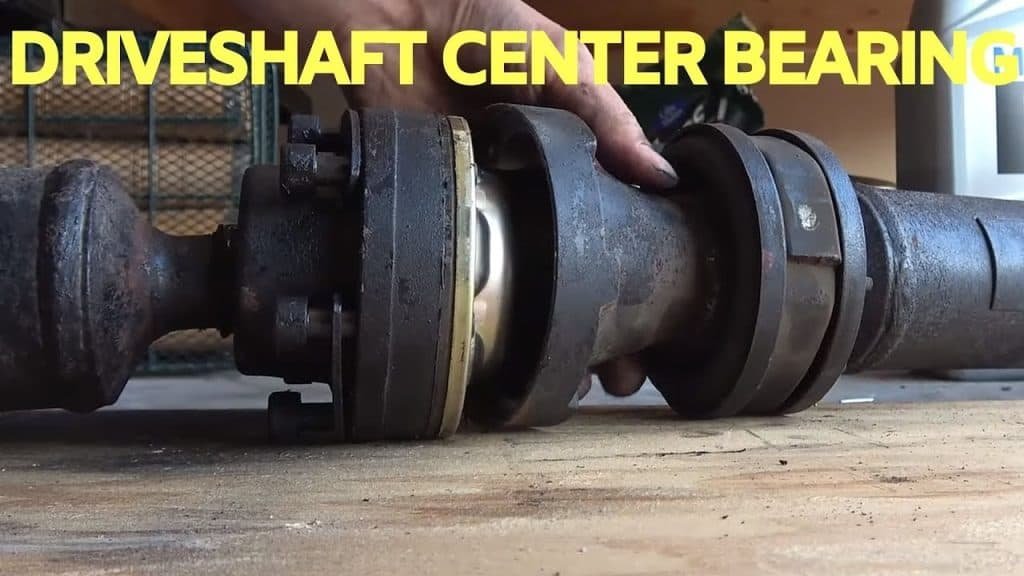
A driveshaft carrier bearing is a support bearing mounted between sections of a multi-piece driveshaft. Many rear-wheel drive, four-wheel drive, and some long-wheelbase vehicles use a two-piece driveshaft connected by a center support. The carrier bearing sits in that center support bracket and holds the driveshaft concentric while allowing rotation.
Key components of a typical carrier bearing assembly:
Inner bearing element — usually a radial ball bearing (single or double row) that allows the driveshaft to spin freely.
Rubber isolator — surrounds the bearing and isolates vibration/noise while maintaining alignment.
Metal flange/housing — bolts to the vehicle’s frame or underbody and keeps the bearing in place.
Functionally, the carrier bearing keeps the driveshaft in alignment, reduces bending and wobble, and dampens vibration transmitted to the chassis.
Types of driveshaft carrier bearing
Not all carrier bearings are identical. Differences come from design, materials, and how they’re mounted. Below are the most common types you’ll encounter.
1. Center support bearing assembly (rubber-cushioned)
This is the most common configuration. The bearing is press-fit into a rubber surround which is bonded to a metal flange. The rubber cushion isolates vibration and noise. These assemblies are commonly sold as a single replaceable unit (bearing + rubber + bracket).
Typical uses: OEM replacements, passenger cars, light trucks.
2. Press-fit radial ball bearings (bearing only)
Some applications use a bare radial bearing pressed directly onto the driveshaft with a separate clamp or bracket. The damping may come from separate rubber parts or the design of the flange.
Typical uses: Heavy-duty or older vehicles and some industrial driveline setups.
3. Double-row bearings
Double-row radial bearings provide higher radial load capacity and may be used where there’s more side load or where bearing life must be increased.
Typical uses: Heavy-duty trucks or vehicles with larger driveshafts and higher loads.
4. Sealed vs. serviceable bearings
Sealed bearings arrive pre-lubricated and sealed for life — low maintenance and typical for OE replacements.
Serviceable bearings have grease fittings or can be regreased during maintenance. Less common in modern passenger cars.
5. Integrated / Flanged carrier bearings
Some vehicles use a carrier bearing integrated into a stamped bracket (complete assembly). These are often sold only as full assemblies — easier to replace but sometimes more expensive.
How do I know if my driveshaft carrier bearing is bad? (Symptoms & diagnosis)
Carrier bearing failures often produce distinct symptoms. Early detection avoids secondary damage to the driveshaft, u-joints, transmission output, or differential.
Common symptoms
- Vibration at certain speeds
A worn or misaligned carrier bearing commonly causes driveline vibrations felt through the floorboard or seats — often at cruising speed (e.g., 40–70 mph) or only when accelerating. - Clunking or knocking noises
Worn rubber or internal play in the bearing can cause clunks when shifting between drive and reverse or when quickly applying power. - Whining or growling noise
If the bearing’s internal rollers are damaged, you may hear a whining or grinding noise that changes with engine rpm. - Wobbling or visible movement of driveshaft
Visual inspection with vehicle safely supported may reveal side-to-side play or wobble in the driveshaft near the center support. - Premature u-joint or driveshaft wear
A failing carrier bearing changes driveline geometry; other driveline parts may wear faster. - Rubber mount deterioration
Cracked, collapsed, or separated rubber isolator is a clear sign the carrier assembly should be replaced.
How to inspect (basic checks)
Visual inspection: Look for cracks, grease leakage, or separation in the rubber housing. Check for rust or damaged mounting bolts.
Wiggle test: With the vehicle on stands and parking brake engaged, grasp the driveshaft on either side of the carrier and try to move it laterally. Any noticeable play likely indicates bearing wear.
Spin test: Rotate the driveshaft by hand near the carrier (with vehicle safely supported). Feel for roughness, binding, or noise from the bearing.
Road test: Note when vibration/noise occurs — is it only at certain speeds, or with throttle input? Patterns help narrow down whether it’s the carrier bearing, U-joints, or wheel/tire imbalance.
Important: Always use proper wheel chocks, jack stands, and follow safety protocols when inspecting under your vehicle.
How to replace a driveshaft carrier bearing — step-by-step

Below is a general step-by-step procedure. Vehicle designs vary widely; always consult the vehicle’s factory service manual for torque specs, special instructions, and any balance procedures.
Tools & materials you’ll need
New carrier bearing or assembly (OEM or BYWB replacement)
Jack and quality jack stands (or a lift)
Basic socket and wrench set
Torque wrench
Screwdrivers, pry bar
Bearing puller or hydraulic press (recommended)
Hammer and appropriately sized sockets (for tapping)
Marker/paint to mark driveshaft alignment
Penetrating oil (for corroded bolts)
Anti-seize compound
Safety glasses and gloves
Estimated time: For a competent DIYer with proper tools, 1.5–4 hours. (Professional shops may be faster.)
Step 1 — Safety first & prep
- Park on a level surface, set the parking brake, and chock the wheels.
- Lift the vehicle with a jack and securely place it on jack stands (never rely on a jack alone).
- Support/remove components as required to access the driveshaft area (consult service manual).
Step 2 — Mark the driveshaft
Before disassembly, mark the rotational alignment of the driveshaft flanges and shaft with paint or scribe marks. This preserves the original balance orientation and helps prevent vibration after reassembly.
Step 3 — Remove driveshaft fasteners
- Unbolt the driveshaft from the rear differential flange (or flanges) and transmission output flange as required.
- If the driveshaft has a center support bracket, unbolt the bracket from the vehicle body and lower the driveshaft gently.
Tip: Keep bolts and hardware organized — some vehicles reuse flange bolts and may require replacement if stretched or corroded.
Step 4 — Remove the old carrier bearing
There are two common approaches depending on whether the assembly is a pressed unit or a separate bearing:
If it’s a full assembly (bearing + bracket): Remove mounting bolts and replace the entire assembly. This is the simplest route and recommended for most DIYers.
If it’s a pressed bearing on the shaft: Use a bearing puller or press to remove the old bearing from the shaft. Carefully protect the driveshaft tube and splines. In a pinch, you can use a socket and hammer to drive the bearing off, but this can damage the shaft if not done properly.
Warning: Don’t pry or hammer on the driveshaft splines or tubes — they’re expensive to repair.
Step 5 — Install the new bearing
Press-fit bearing: Clean the shaft, apply a light coat of anti-seize, and press the new bearing onto the shaft using a press or appropriate socket that bears only on the inner race. Avoid applying force to the outer race.
Full assembly: Bolt the new assembly into place per manufacturer torque specs. Ensure the rubber isolator is seated correctly.
Step 6 — Reinstall driveshaft and torque bolts
- Reinstall the driveshaft using your alignment marks to maintain balance orientation.
- Tighten the flange bolts to the specified torque in the service manual.
- Reattach any brackets and torque all fasteners properly.
Step 7 — Final checks & test drive
- Double-check all fasteners and that the bearing bracket is secure.
- Lower the vehicle and perform a static visual inspection.
- Test drive at low speeds first. Listen for unusual noises and monitor for vibration. Gradually increase speed to confirm repair success.
When professional help or balancing is needed
If vibration persists after correct installation and alignment, the driveshaft may need professional dynamic balancing.
If the driveshaft shows signs of bent tubes or damaged splines, consult a driveline shop.
Press-fit operations without the right tools can damage components — consider a shop if you lack a press or puller.
Maintenance tips to maximize carrier bearing life
Use quality replacement parts — cheap bearings can fail early.
Inspect carrier bearing rubber and mounting bolts during routine service (every 30–50k miles or per vehicle manual).
Keep driveline components properly lubricated and maintain u-joints.
Avoid consistently overloading the vehicle or towing beyond capacity — excess loads increase driveline stress.
Replace damaged or out-of-balance driveshaft components promptly to prevent cascading failures.
BYWB Bearing recommendations
At BYWB Bearing, we recommend replacing the carrier bearing assembly (bearing + rubber + bracket) whenever possible for a reliable, trouble-free repair. Our center support bearings are manufactured to meet strict dimensional and material standards so you get a close fit and long service life. If you’re unsure about fitment for your vehicle model, provide the VIN or original part number and BYWB can help identify the correct replacement.
Conclusion
A driveshaft carrier bearing is small, but its condition has a direct impact on drivability, noise, and safety. Recognizing the symptoms — vibration, clunking, visible rubber deterioration — and acting quickly prevents damage to other driveline components. Replacing the carrier bearing is a straightforward repair for experienced DIYers if you have the right tools and follow safety procedures. For press-fit removals, dynamic balancing, or uncertain diagnoses, professional help is the safer choice.
If you want a reliable replacement, choose a quality assembly (like BYWB Bearing’s center support units) and always follow the vehicle manufacturer’s torque and assembly procedures. Replace worn bearings promptly, maintain your driveline, and you’ll avoid most common vibration and noise issues.
Short FAQ
Q: Can I drive with a bad carrier bearing?
A: Short distances at low speed are possible, but continued driving can damage the driveshaft, u-joints, and cause unsafe vibrations. Replace it as soon as practical.
Q: Is it necessary to balance the driveshaft after replacing the carrier bearing?
A: Usually not if you reinstall with factory alignment marks and the driveshaft is undamaged. If vibration persists, have the driveshaft checked and balanced by a professional.
Q: How long does a carrier bearing last?
A: With normal use, many last 100,000+ miles, but heat, contamination, towing, or heavy loads shorten life. Inspect periodically.
Q: Can I replace only the bearing inside the rubber housing?
A: Technically yes if you have a press and experience, but replacing the full assembly is recommended for most DIY repairs to ensure correct damping and alignment.
