
Driving a noisy car is annoying, especially when you cannot guess where the noise is from. Sometimes, confusion regarding the noise source can lead to prolonged trouble. For example, you might mistake the noise from the wheel hub bearing for a fault in the tire or any other part of the car.
This article tells you a step-by-step procedure to identify and to replace a front wheel bearing. So, let’s get started!
Wheel Bearing Noise
Wheel bearing noise is hard to identify as it travels through the car. Yet, ensuring the sound is from the wheel bearing is critical. The first step to identify a wheel bearing’s fault is to try to listen to where the noise is coming from. Seasoned drivers can typically diagnose where the sound comes from by listening carefully, especially when they have had a bad earlier experience. However, if you are experiencing this weird noise for the first time, here’s how you can see if it’s a bad bearing:
- Take a long screwdriver and put the metal tip on the hub near the wheel bearing.
- Ask someone to put the car in gear and speed up the wheels to 40 mph.
- Put your ear on the other end of the screwdriver to listen to the noise.
- Try with both wheels to check where the noise is loud and clear.
- You found the culprit!
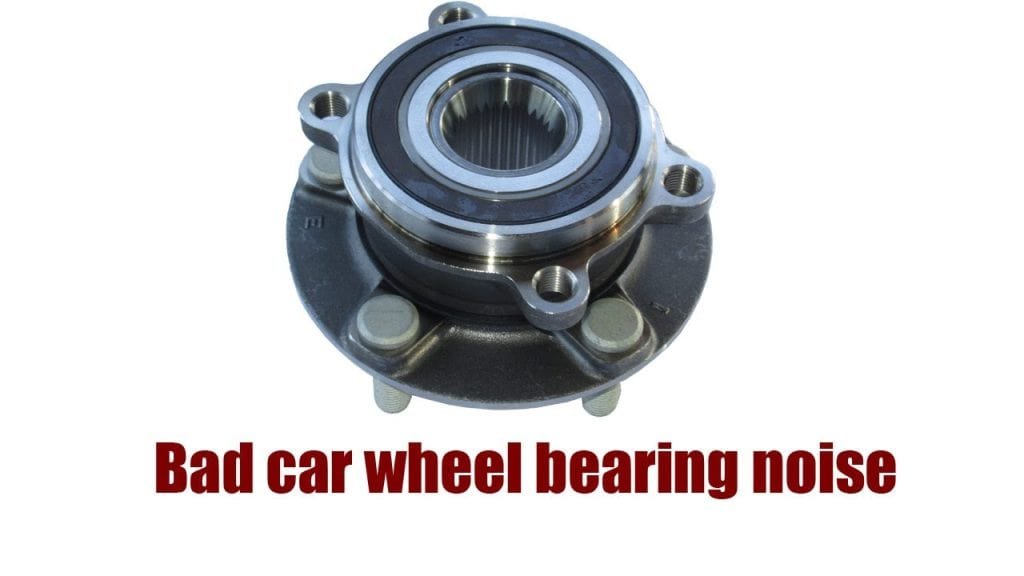
Can You Change A Wheel Bearing Yourself?
Most people rush to a mechanic immediately when they hear a sound in the car. While some mechanics may be honest, a few might tell you it’s the wheel bearing when it could be something else. Now that you know how to check the wheel bearing, you can fix the front or rear wheel bearing yourself. Initially, it might seem technical and challenging, but this guide will make the process easy to follow. You can always take the vehicle to the mechanic, but who doesn’t want to save some bucks anyway?
When to Replace a Wheel Bearing?
As mentioned, the annoying sound traveling through the vehicle is one of the most common signs of degrading wheel hub bearing. However, it is not the only one. There could be a number of indicators pointing toward the need for a new wheel bearing.
Bearing Play
Bearing play, indicated by wobbly tires, is one of the most common indications of worn-out bearings. You will see your tire tread worn out more on one side than the other. However, it might also indicate improper wheel balancing or alignment. So, it is better to get a mechanic’s opinion before you replace the bearings.
Wheel Lock
If you have sealed wheel bearings, wheel locks are another symptom that your wheel bearings need replacement. Dirt, debris, or contamination in the bearings often leads to friction, increasing heat generation. Thus, the bearings may lock, leading to wheel lock.
Pulling to One Side
Your car’s handling is responsive when the bearings are working fine. But deteriorating front and rear wheel bearings tend to drift your car to one side, and you do not feel the tightness.
Braking Problems
When the bearings are damaged, you may experience wobble even when you hit the brakes. It happens as they come in and out of the rotor’s contact, causing uneven wear on the brake pads.
Steering Issues
A worsening wheel bearing will also cause a wobble in your steering wheel due to corrosion. Accelerating will further damage the bearings and may lead to loosening the steering more.
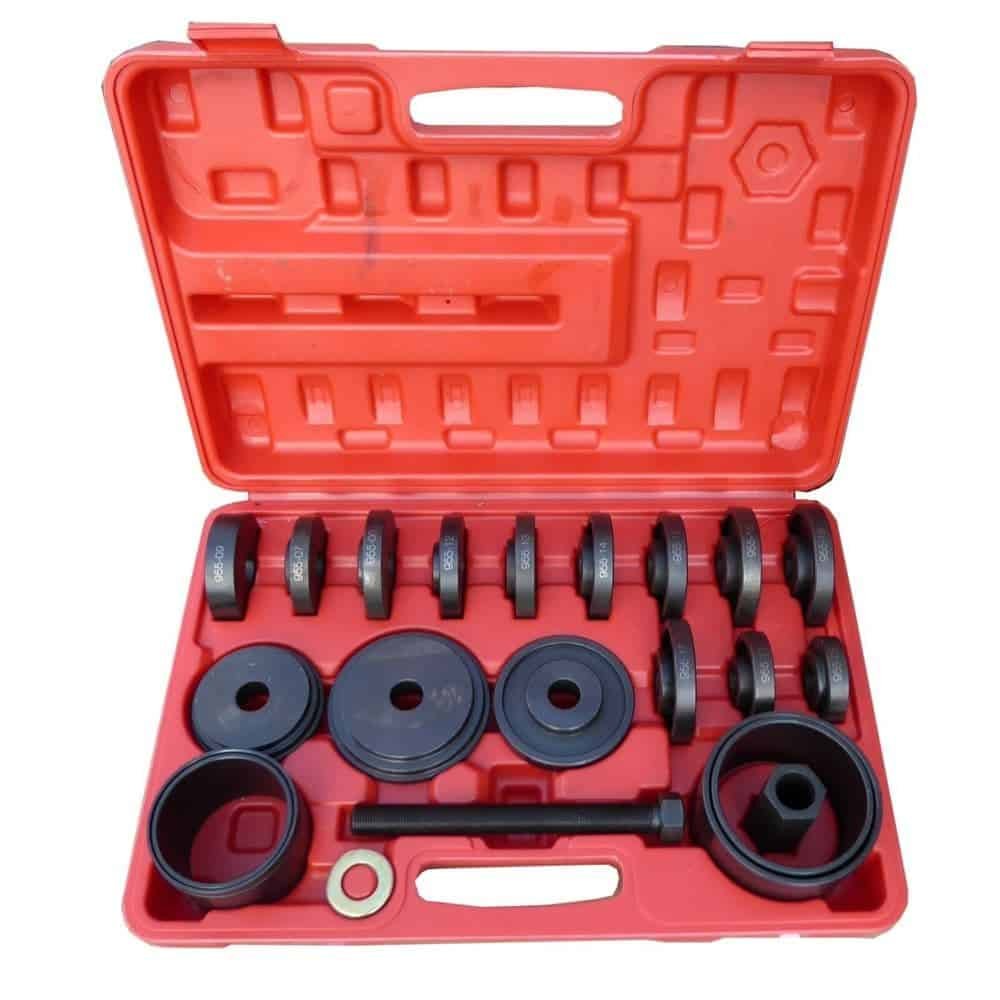
What Tool Do You Need to Replace a Wheel Hub Bearing?
Here’s the list for you:
- Screwdriver
- Wheel chocks
- Jack
- Purpose-made axle stand
- Pliers
- Skinny socket wrench
- Hammer
- Small wooden block
- Spare race
- Grease
- Rags
How to Remove the Front Wheel Bearing
Wheel bearings are small but important to your vehicle’s assembly. Before installing new bearings, you need to remove the hub assembly. So, you must carefully follow the steps when changing your car’s bearings. Here’s how you can disassemble the parts before installing new bearings:
Secure your Car’s Wheels
The first step to replacing your car’s wheel bearings is to secure the wheels you will not work with. Park your car on a flat surface and put it in neutral/ 1st gear/ reverse/ park, depending on your car’s functionality. Also, put the parking brake up to ensure it does not move. Next, use wheel chocks to secure your car’s wheels you do not plan on working on. Use the chocks to secure the rear wheels to replace a front wheel hub bearing and vice versa.
Lift the Front Wheels
Now that you have secured your vehicle to ensure it stays in place, it is time to start working on the wheel you want to change bearings of. Loosen the lug nuts of the wheel with a tire iron and lift it using a jack.
Ensure that the jack is flush with the ground and the car is secured on the jack. The jack must be on a sturdy metal piece on the vehicle before you lift the wheel. Your car’s owner’s manual might also show the jack position for added help.
Alternatively, use a purpose-made axle stand to take the weight of your car’s other side.
Disconnect the ABS Connector
Now that you have lifted the vehicle, it’s time to get to the technical aspects of wheel bearing removal. If your car has ABS, you must first disconnect it as it must be connected to the engine compartment. Disconnect it from the wire harness and take out the hold-down clips before attaching the harness to the wheel.
Remove the Wheel
You are ready to remove the wheel after loosening the nuts disconnecting the ABS connector. Take the nuts out and remove the wheel slowly. Keep the lug nuts in a safe place to not lose them.
Take Out the Brake Caliper, Dust Cover, Cotter Pin, and Castle Nut
It might sound like a lot, but trust us, it’s very simple!
After removing the wheel, take out other parts of the assembly, including the brake caliper. Take out the brake caliper’s bolts using a ratchet and a socket, and then remove the caliper. Take it out slowly, as leaving it to dangle can damage the brake hose. Moreover, use a short string to tie the brake caliper in place.
Next, look for the dust cover besides the rotor and take it out with calipers. You will see the cotter pin and castle nut within the cover; remove them as well using pliers.
Remove the Rotor and Hub
Before you move to the wheel hub bearing, you must remove the rotor and wheel hub.
Remove the rotor by placing your thumb on the peg in the assembly and firmly bump the rotor with your other hand’s palm until it falls out. Remove the rotor carefully. Sometimes, the rotor gets stuck, and you can use a rubber mallet to take it out. But remember that it will damage the rotor. So, use the mallet only if you want to replace the rotor as well.
Removing the hub is the last part of the process before reaching the wheel hub bearing. Use a skinny socket wrench to loosen the bolt screws from the bearing hub and take it off the axle.
Remove the Wheel Hub Bearing
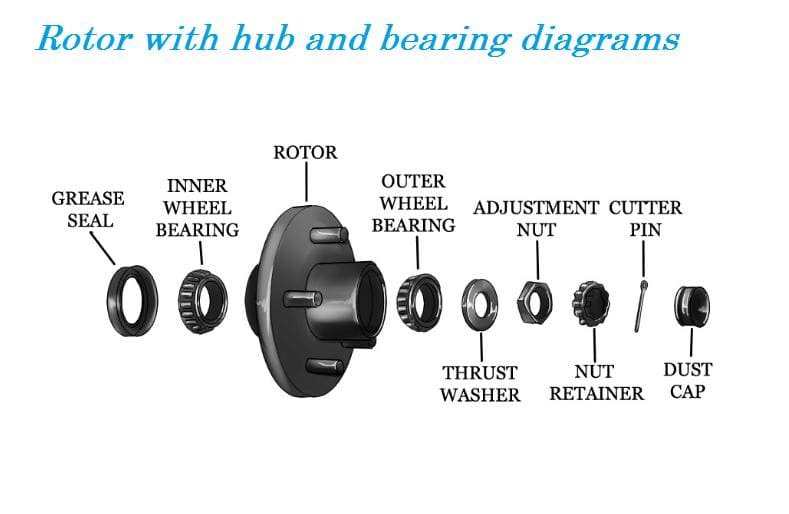
Taking apart the hub assembly with a wrench or hammer will give you access to the bearings. So, remove the central bolt using a puller to separate the assembly and take out the bearings.
After separating the assembly, you can take out the races to clean the grease around the knuckles. However, this means you also need to install a new race.
How to Replace a Front Wheel Bearing
Now, it is time to install the new wheel bearings and say goodbye to that annoying noise. Here’s a simple way to replace your front or rear wheel bearing:
Install New Wheel Bearings
After removing the previous bearings, install new races in the wheel hub bearing assembly with a hammer. Set the new inner bearings, ensuring they are properly aligned and pushed in. Make sure to apply loads of grease to ensure smooth working. Then, tap the grease seal into place using a small wood block if needed.
Grease the Hub
Install the hub assembly and grease between the races to reduce friction as much as possible. Also, apply some to the spindle. The grease will also prevent rusting from any moisture that enters the assembly.
Attach the Rotor
Now, attach the brake rotor onto the spindle in a sliding manner with the help of bolts. If it takes effort to slide the rotor, take it out and ensure the bearing is flat; slide it again.
Tighten the nut after placing it on the spindle. Spin the rotor a few times to make space and tighten the nut further by hand. Repeat the process a few times; it ensures the wheel hub bearing is in place.
Install the Cotter Pin
Next, install a new cotter pin after placing the retaining it in the nut. It will secure the assembly in place.
Install the Dust Cap
Lastly, rub grease on the inside of the dust cap and place it carefully on the assembly. Also, put back the brake caliper and brake pads and secure them with bolts. Then, it’s time to attach the tire and tighten the lug nuts.
Bring the Vehicle Down
After you have installed everything back to your vehicle’s wheel, you can remove the jack or the purpose-made axle stand to bring the car down. Start and check if it still makes any sound. We are positive you will not hear anything after following the process properly.
You can change the front or rear wheel bearing using the same process.
Important Tips when Replacing Wheel Bearings
- Ensure the jack is mounted properly on a rigid surface and flat on the ground before you lift the vehicle.
- Keep all the tiny screws safe to put the assembly back into place easily.
- Grease the bearings thoroughly before installing them into the assembly.
- Too much grease is as bad as little grease.
- Keep rags with you to clean the excess grease around the knuckles.
- Buy spare races when replacing a larger wheel hub bearing, as it typically does not come with the race.
- Do not exert pressure on the assembly parts, as it may damage them.
FAQs
How Long Does It Take to Change a Wheel Bearing?
Depending on the vehicle and the mechanic’s expertise, replacing the bearing might take a professional between fifteen minutes and three hours. Usually, front bearings take 30 minutes, whereas a rear wheel bearing may take up to 45 minutes. However, if you are replacing wheel bearings for the first time, it could take anywhere between four to six hours. But don’t worry; you will be able to do it faster next time.
How Much Is a Wheel Bearing Replacement?
Wheel bearing replacements cost between $200 and $400, but the prices vary vastly from region to region. However, adding the cost of other parts will increase the cost. For example, if you also require a wheel hub replacement, it might raise the cost to $500-$600. The price also depends on the wheel and hub type the mechanic needs to install.
How Long Do Wheel Bearings Last?
A wheel hub bearing lasts 75,000 to 100,000 miles, yet the numbers fluctuate depending on various factors. The manufacturer and use of the vehicle play a significant role in the lifespan of these bearings. The driving load is also a contributing factor regarding wheel bearing health. You must check the bearings if you experience wobbling when hitting the brakes or accelerating. Replace the wheel bearings as soon as you see any signs of deterioration.
Final Words
Wheel bearing is an important part of the wheel assembly, and rusted bearings can lead to steering, brake, and tire issues. Thus, if you hear a sound in your car you cannot locate, it is best to check if the wheel bearings are working fine. In case the wheel bearings cause the noise, you have no option but to replace them immediately. This guide tells you everything you need to know about removing the old bearings, installing new bearings, and everything important to remember while doing so. While this guide is a standard for replacing a front wheel hub bearing, you must consider your vehicle manufacturing.
